Platform SSO is a partnership between Apple, device management solutions, and IdPs. It is an SSO feature created by Apple for its Mac devices. It leverages Apple’s SSO extension (SSOe) framework for secure, passwordless authentication using Touch ID or secure tokens.
Through Platform SSO, users benefit from passwordless authentication, enhanced security, and a consistent experience across all devices, enterprise apps, and web browsers.
Let’s delve into what Platform SSO is and how you can set it up in simple steps with the Scalefusion dashboard.
What is Platform SSO?
Platform SSO is an advanced SSO feature developed by Apple. Available for macOS 13 and later, it replaces Active Directory binding. It allows admins to configure system-level SSO, enabling:
- User authentication at the macOS platform level
- Consistent identity usage across system services and apps
- Improved login experience for enterprise-managed Macs
How to configure Platform SSO on macOS
Prerequisites
To fully implement Platform SSO, you will need to make sure that:
- The Mac devices are running macOS 13 or later
- A Mac with Apple Silicon or an Intel-based Mac with Touch ID
- A device management service, such as Scalefusion, that supports the Extensible Single Sign-On configuration, which includes settings for Platform SSO
- An app containing a Platform SSO extension compatible with the IdP
- An IdP that supports Simplified Setup for Platform SSO
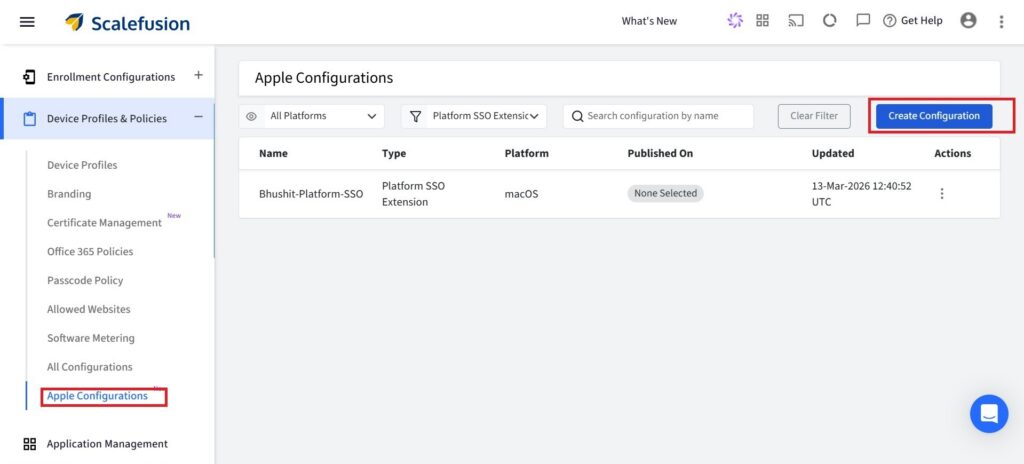
Step 1 – Create a Platform SSO Configuration
On your Scalefusion dashboard, click on Device Profiles & Policies and then click on Apple configuration. Start by creating a new Platform SSO configuration in your management console. Give it a clear name so it can be easily identified later.
It is important to note that when enabling the ‘Remove this configuration when relaxing the policies on the device’ option, the configuration will be automatically removed in the following scenarios:
- When policies are relaxed, or
- When the device is unlocked via the dashboard
When the device profile is deleted, all associated configurations and data will be cleared from the device.
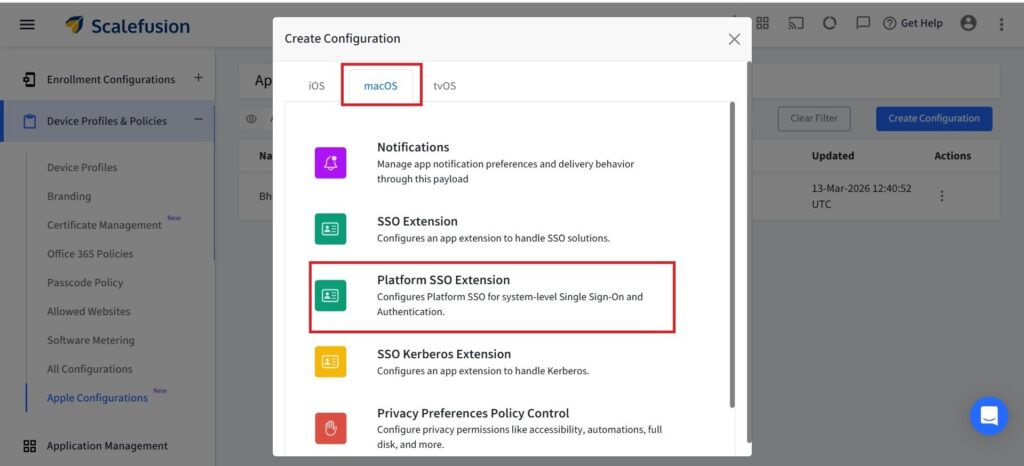
Step 2 – Define Extension Details
Next, configure the SSO extension that will handle authentication on macOS.
Here, you specify the extension identifier and team identifier to ensure the correct extension is used. You also define the URLs where Platform SSO should be applied.

Additionally, you can manage how authentication behaves when the screen is locked, exclude specific apps from using Platform SSO via Denied Bundle Identifiers, and pass a dictionary of arbitrary data to the app extension, if required.
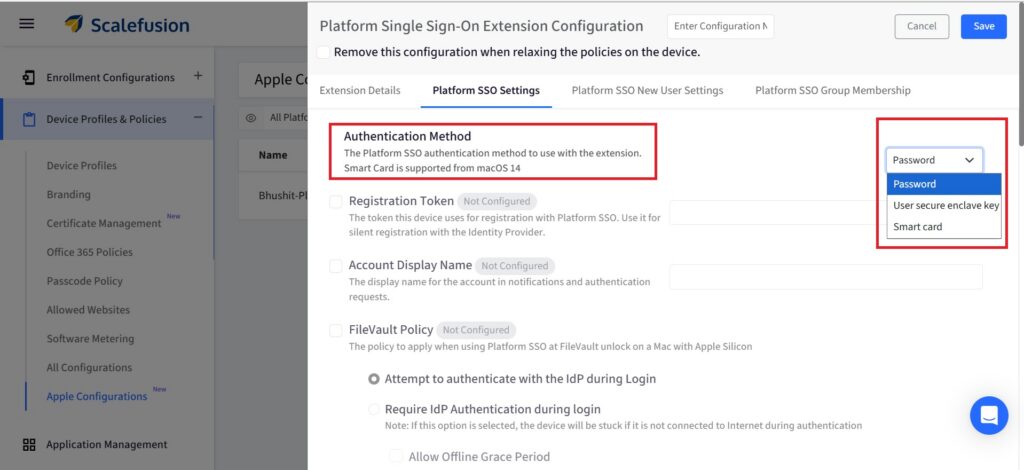
Step 3 – Choose Authentication Method
Select how users will authenticate using Platform SSO.
You can use Password-based authentication, Secure Enclave-based authentication, or Smart Card authentication (supported on macOS 14 and later). The option you choose determines what additional policies can be configured.
Step 4 – Configure Identity Settings
Set up identity-related details such as the registration token, which allows automatic device registration with the identity provider.
You can also define the account display name that users will see during login and system prompts.
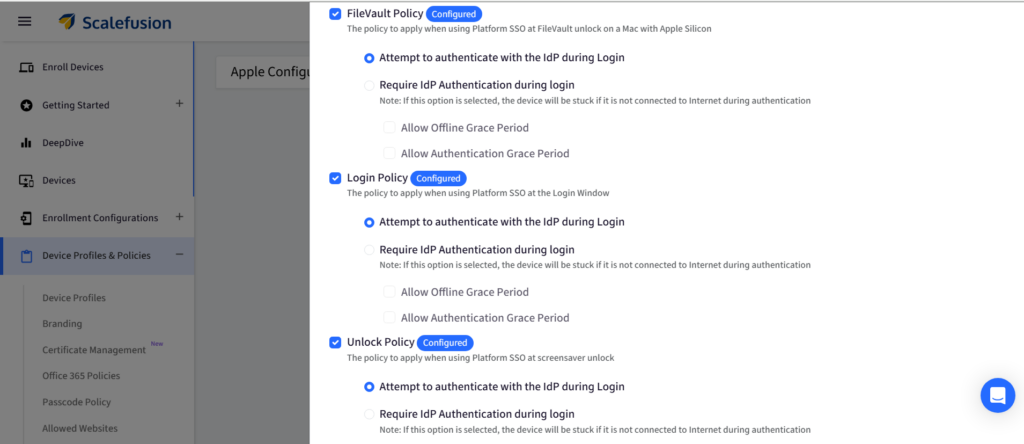
Step 5 – Set FileVault, Login, and Unlock Policies
Define how authentication should work across macOS login, FileVault, and unlock flows.
You can either allow authentication attempts via the identity provider or require it mandatorily. Optional settings like offline grace period and authentication grace period help manage cases where network or re-authentication is limited.
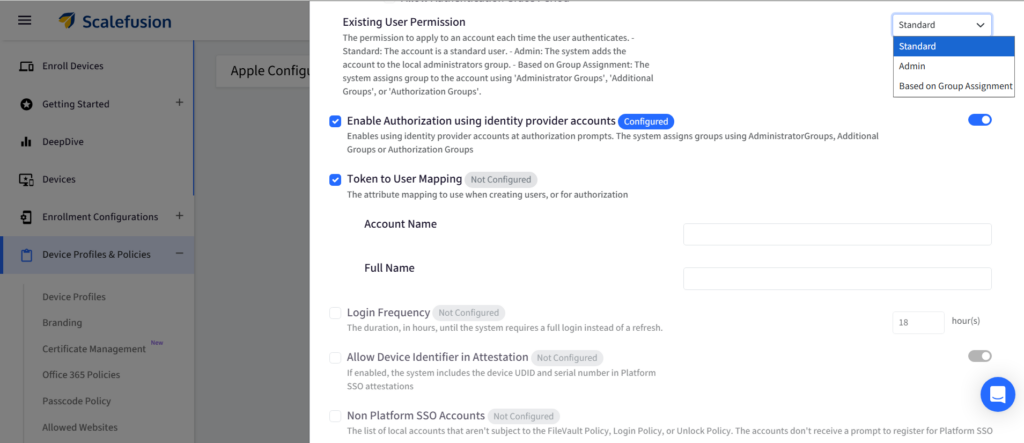
Step 6 – Configure User and Access Settings
Now define how users and permissions are managed.
You can assign user roles (Standard or Admin) or map permissions based on group membership. Identity provider accounts can also be enabled for system-level authorization prompts.
You can also map identity attributes to macOS user fields, control login frequency requirements, and enable syncing of profile pictures from the identity provider.
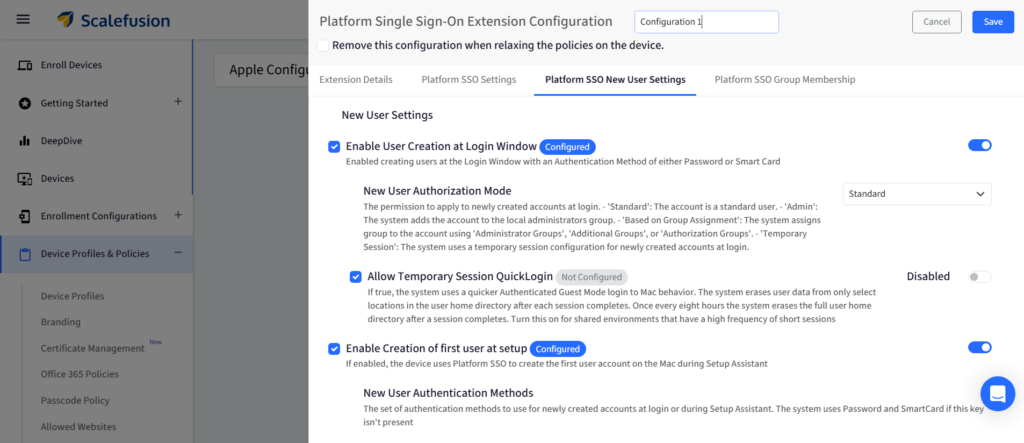
Step 7 – Configure New User Creation
Manage how new users are created on macOS devices.
You can allow user creation in the login window, specify whether new users are Standard, Admin, or group-based, and even enable temporary sessions for shared device use.
You can also enable first-user creation during Setup Assistant for zero-touch onboarding.
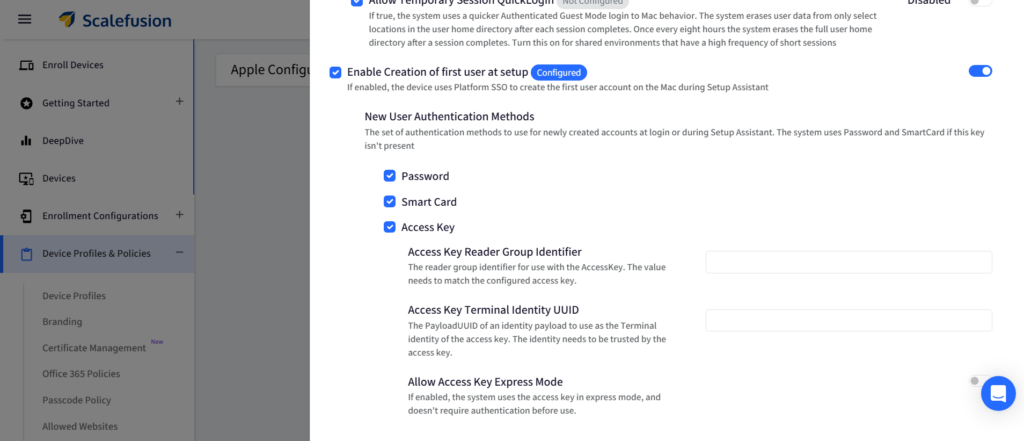
Step 8 – Configure Authentication for New Users
Choose authentication methods available for new users, such as Password, Smart Card, or Access Key.
For Access Key, you can optionally configure:
- Access Key Reader Group Identifier: This setting specifies which Access Key reader group the system should use.
- Access Key Terminal Identity UUID: This setting links the Access Key to a specific identity payload configured on the device.
- Allow Access Key Express Mode: When enabled, Access Key can be used in Express Mode, which allows it to be used without requiring additional authentication steps.
Step 9 – Configure Groups and Authorization
Define group-based access control by assigning admin groups, creating additional groups, and mapping authorization rights to specific groups for role-based control.

Step 10: Save and Deploy
Finally, review all settings, save the configuration, and deploy it to macOS devices. Platform SSO will then enforce the defined authentication and access policies across the system.
Enhance your security posture across the entire macOS ecosystem
Platform SSO bridges the gap between security and simplicity by making SSO an Apple-native feature. Through this, organizations can further bolster their security posture by implementing SSO across all Mac devices with ease and increase the efficiency of their workflows.
Scalefusion seamlessly supports Platform SSO and provides IT teams with the ease of implementing it through a centralized dashboard. This reduces IT overhead and simplifies macOS management, which allows all users to sign in once to get access to all their work apps without having to remember individual passwords. Not to mention, it also increases the overall security of the managed system by preventing breaches via password phishing and credential stuffing attacks.
Implement Platform SSO for all your macOS devices effortlessly through Scalefusion.
Sign up for a 14-day free trial now.
FAQs
1. Does PSSO support zero-touch deployment?
Yes, Apple PSSO supports zero-touch deployment. With macOS 15 and higher, the PSSO registration can occur directly within the macOS Setup Assistant, allowing for a zero-touch workflow where the user logs in with their IdP credentials and the machine is immediately configured.
2. Can PSSO create an initial user account on a Mac?
Yes, PSSO on macOS can create a local user account at the login window using IdP credentials, such as Microsoft Entra ID or Okta. This is often called “on-demand account creation” or “just-in-time provisioning”. This process allows users to authenticate with their corporate credentials, creating a local Mac account with synchronized or Secure Enclave-backed passwords.
3. Do I need an MDM solution to configure PSSO?
Yes. Platform SSO configuration requires an MDM solution to deploy identity configuration profiles, enforce policies, and associate devices with your IdP. Scalefusion supports Platform SSO and provides a robust suite of features to further tweak the settings as per the organization’s specific needs.
