Honestly, setting up a Chromebook for personal use is easy but what about when it comes to preparing it for a business environment? Things tend to get a bit more serious. Ensuring that your device is secure, compliant, and tailored to your business needs is a must. Chromebook enrollment steps in here to alter the everyday device into a business-ready powerhouse.

Okay, so why Chromebook enrollment is essential? It’s the process that links your device to your organization’s management system, enabling IT admins to remotely configure settings, enforce policies, and deploy apps. Equipping your team with Chromebooks or using them for specific tasks like point-of-sale systems, enrollment ensures every device is optimized for business use.
From the basics of enterprise enrollment to step-by-step instructions for enrolling a Chromebook with Scalefusion MDM, Let’s get started!
What is Enterprise Enrollment on a Chromebook?
If defined simply, Chromebook Enterprise enrollment is the process of linking the device to your business or organization’s management system. Once enrolled, IT teams can remotely manage settings, enforce security policies, and deploy apps, ensuring the device is tailored to business needs.
For example, suppose your company uses Chromebooks for customer check-ins or as workstations. In that case, enterprise enrollment ensures they’re locked down to business-related functions—no unnecessary browsing or downloading unauthorized apps.
Why does it matter? Without enrollment, managing devices manually becomes a logistical headache. Enterprise enrollment automates that, saving time and ensuring compliance with IT policies.
Pre-requisites
Before diving into Chrome enrollment, make sure you’ve set the stage for Chromebook enterprise management.
Here’s what you’ll need:
- Create a device profile on the Scalefusion Dashboard to define configurations, apps, and security settings for managing Chrome OS devices effectively.
- Sync your Organizational Units (OUs) from Google Workspace to the Scalefusion Dashboard. This step ensures proper alignment with your Google enterprise enrollment setup.
- Link the device profiles to the imported OUs to standardize settings and simplify Chromebook enterprise management across teams or departments.
- Ensure your devices and network meet the technical specifications needed for successful Chrome enrollment.
How to Enroll a Chromebook with Scalefusion UEM
Getting started with Chromebook enterprise enrollment may seem technical, but with Scalefusion UEM, it’s a straightforward process.
Follow these steps to ensure smooth enrollment and effective ChromeOS device management:
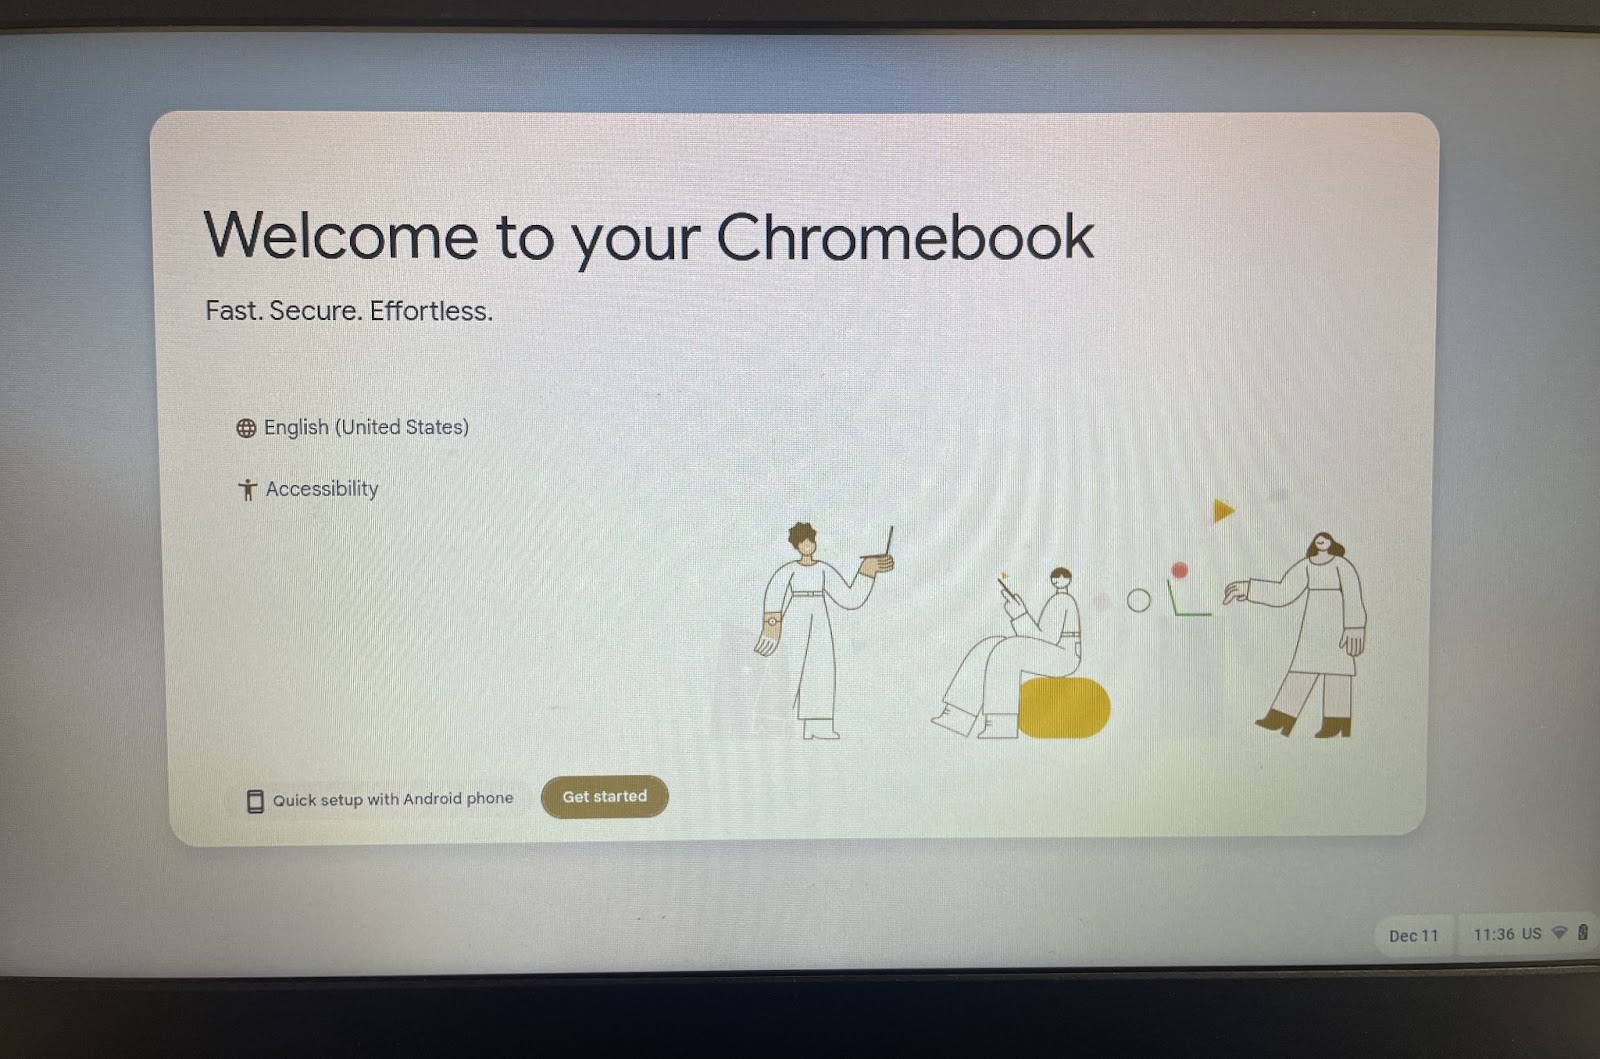
Step 1 – Power On the Chromebook: Start by powering on a new or factory-reset device. On the welcome screen, click Get Started to begin the setup process.
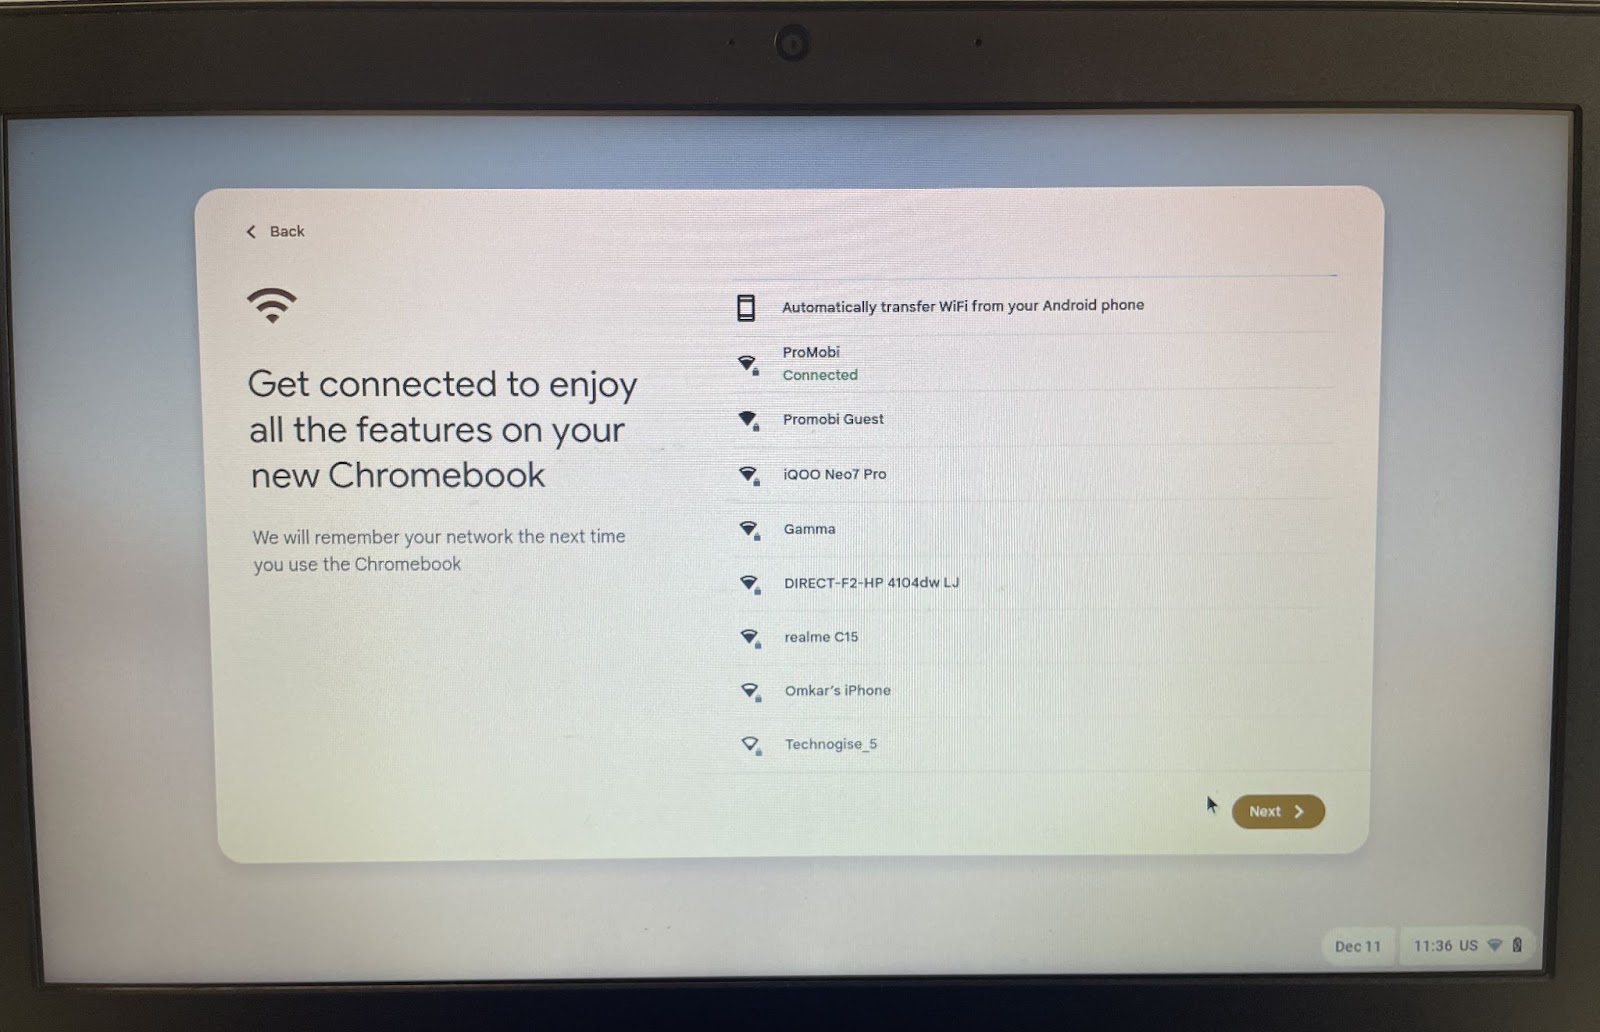
Step 2 – Connect to Wi-Fi: Ensure the device is connected to a stable Wi-Fi network to proceed with the setup.
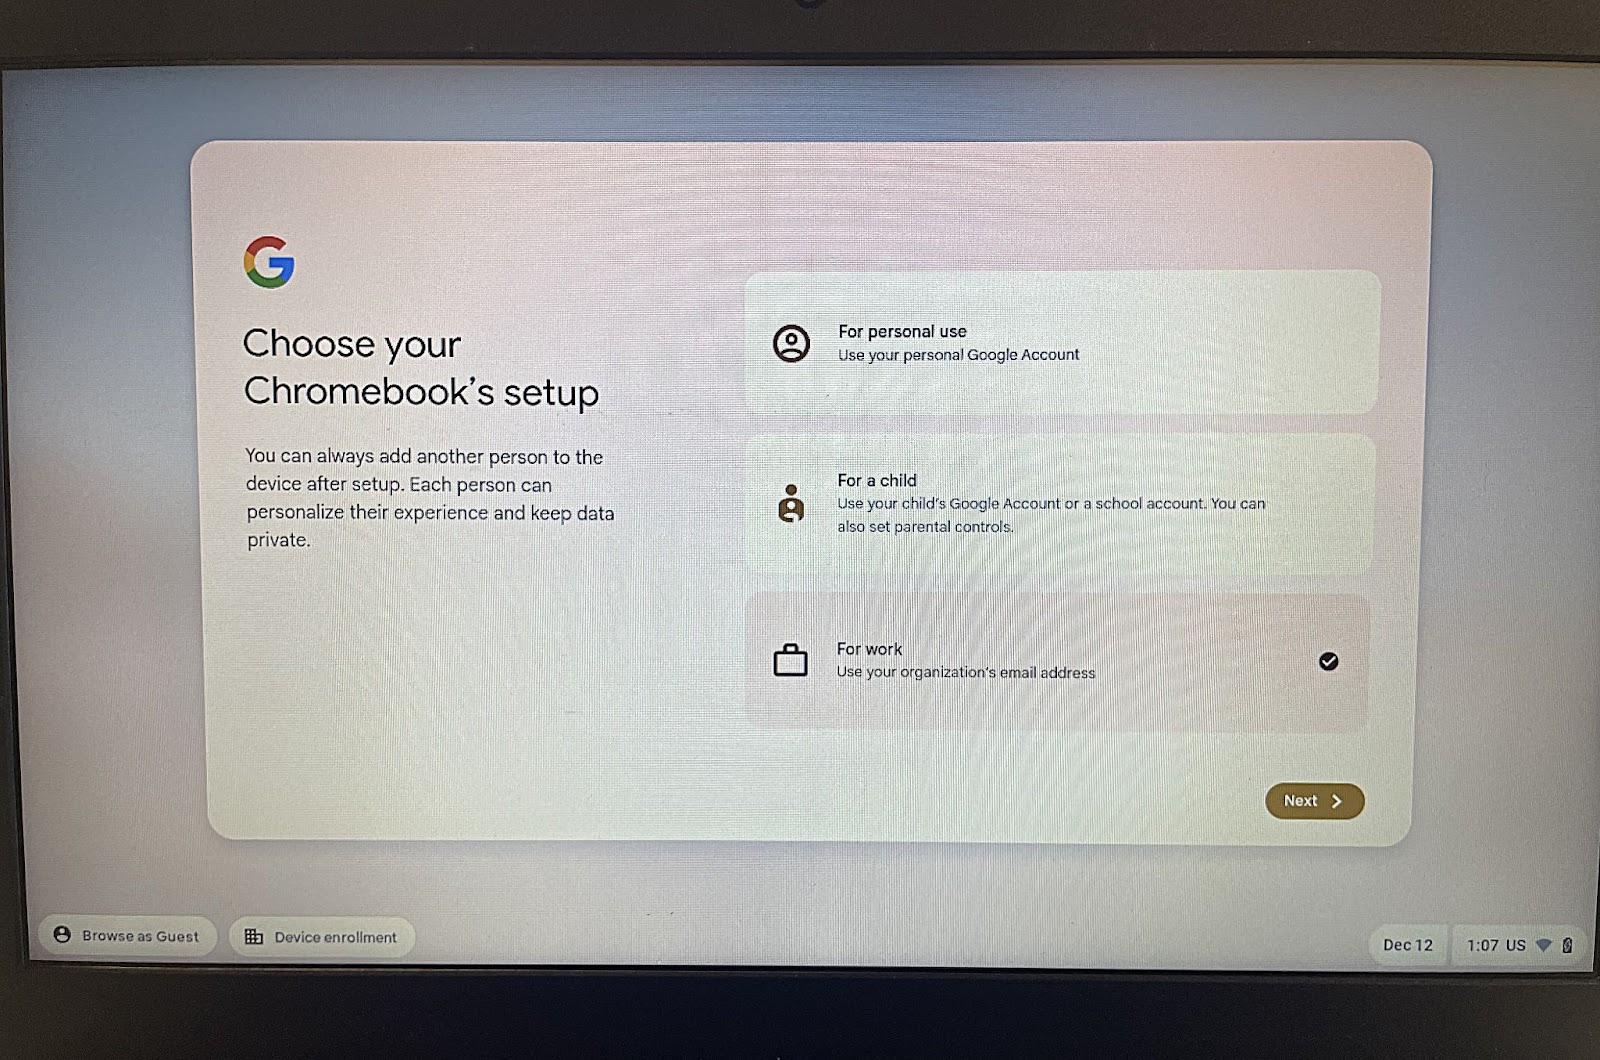
Step 3 – Choose Setup Type: When prompted to choose the setup type, select For Work to initiate the enterprise enrollment Chromebook process.
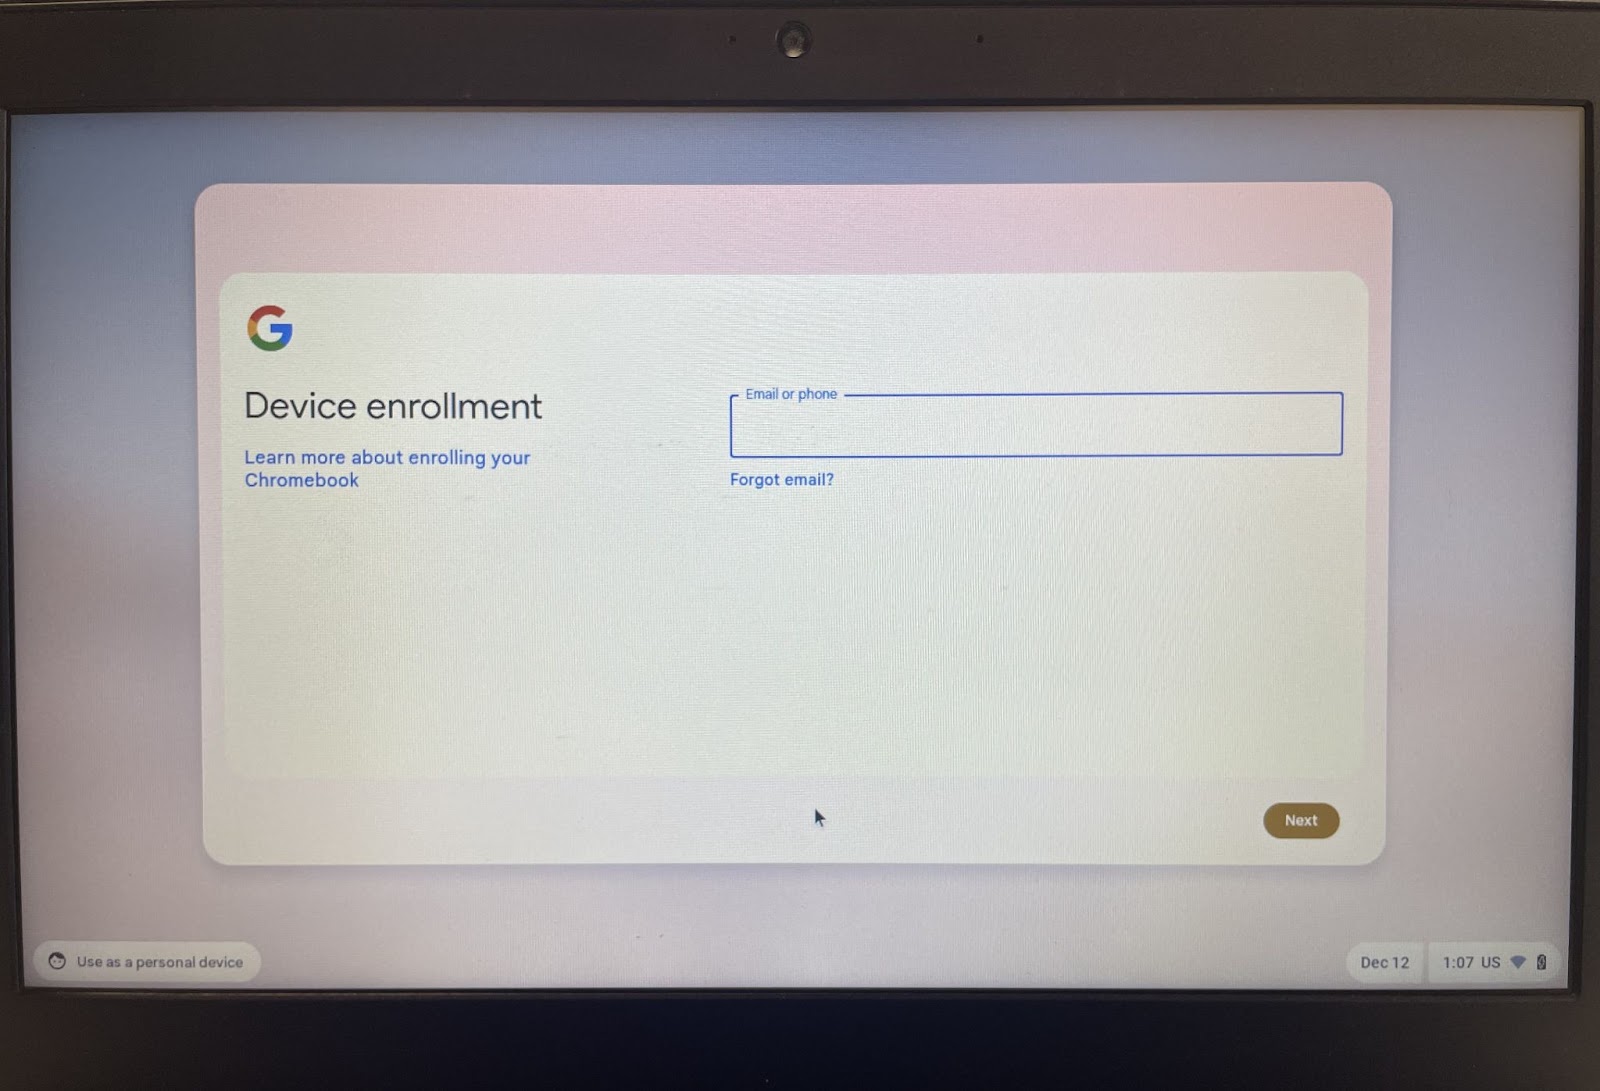
Step 4 – Access the Chromebook Enterprise Enrollment Screen: On the next screen, select Enroll Device to access the enrollment options.
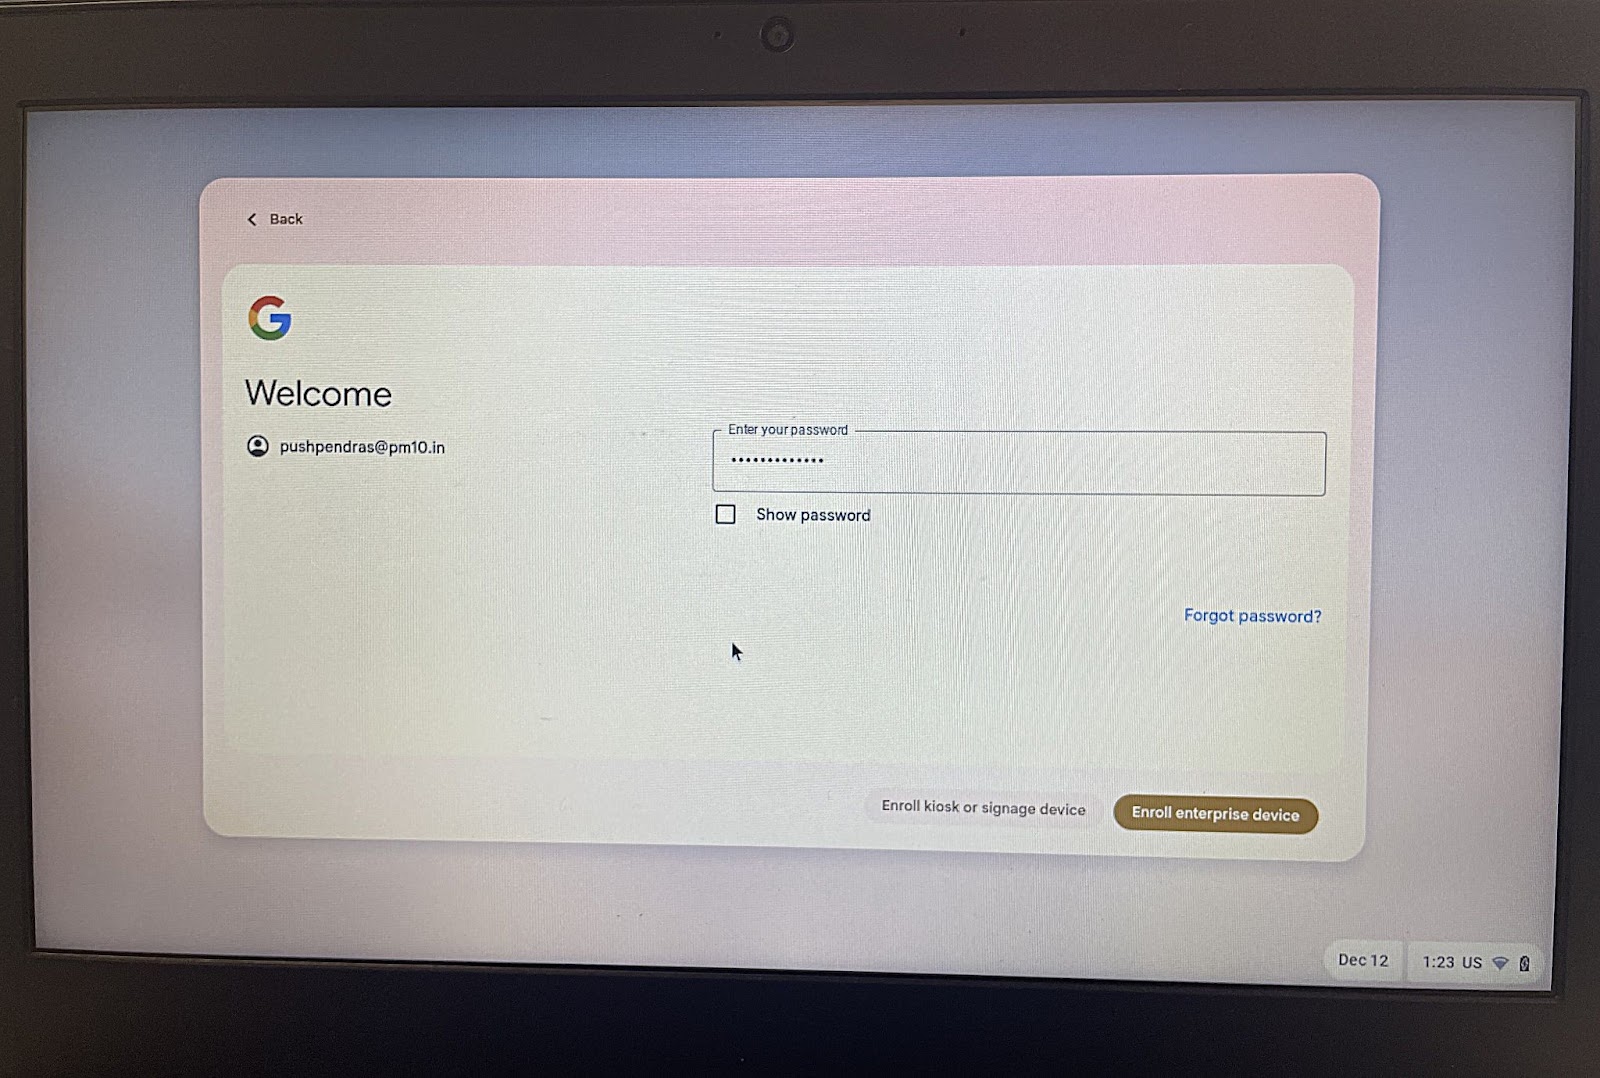
Step 5 – Sign In with Google Workspace: Enter your or your user’s Google Workspace email address and proceed.
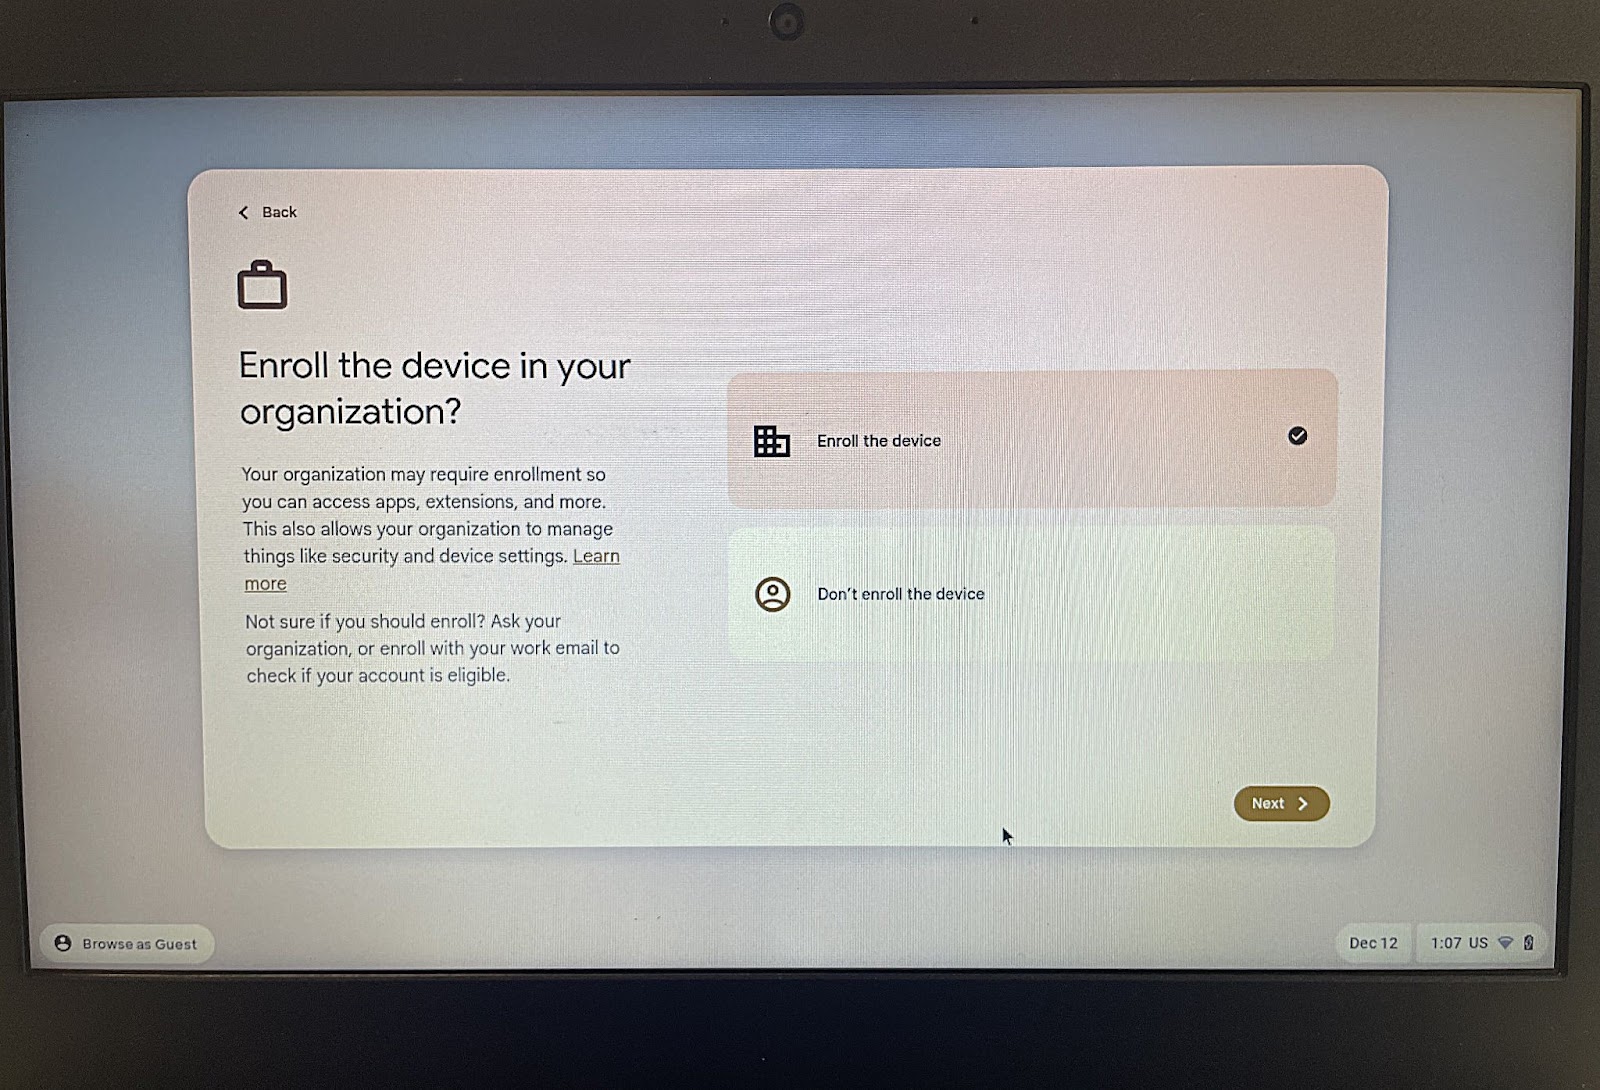
Step 6 – Enter Credentials: Input the password for the Google Workspace account. You’ll then be prompted to choose one of the following:
- Enroll Kiosk or signage device
- Enroll Enterprise device
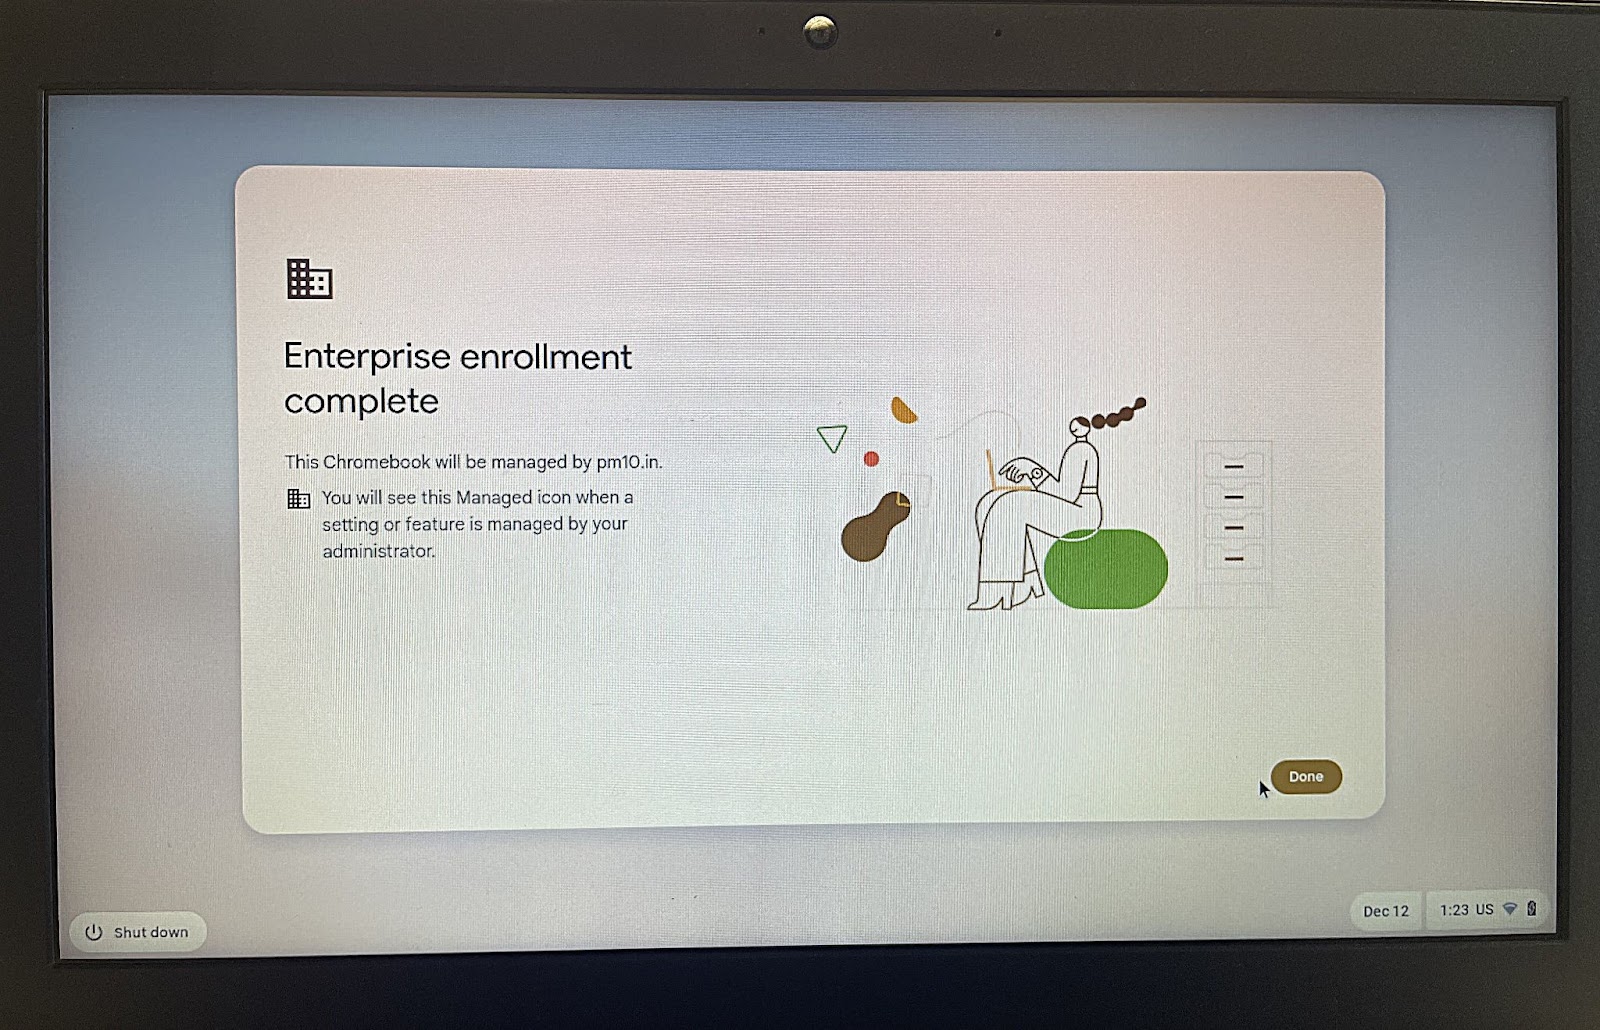
Step 7 – Confirm Enrollment: Once you’ve completed the steps, a confirmation screen will appear. Click Done to finalize the enrollment.
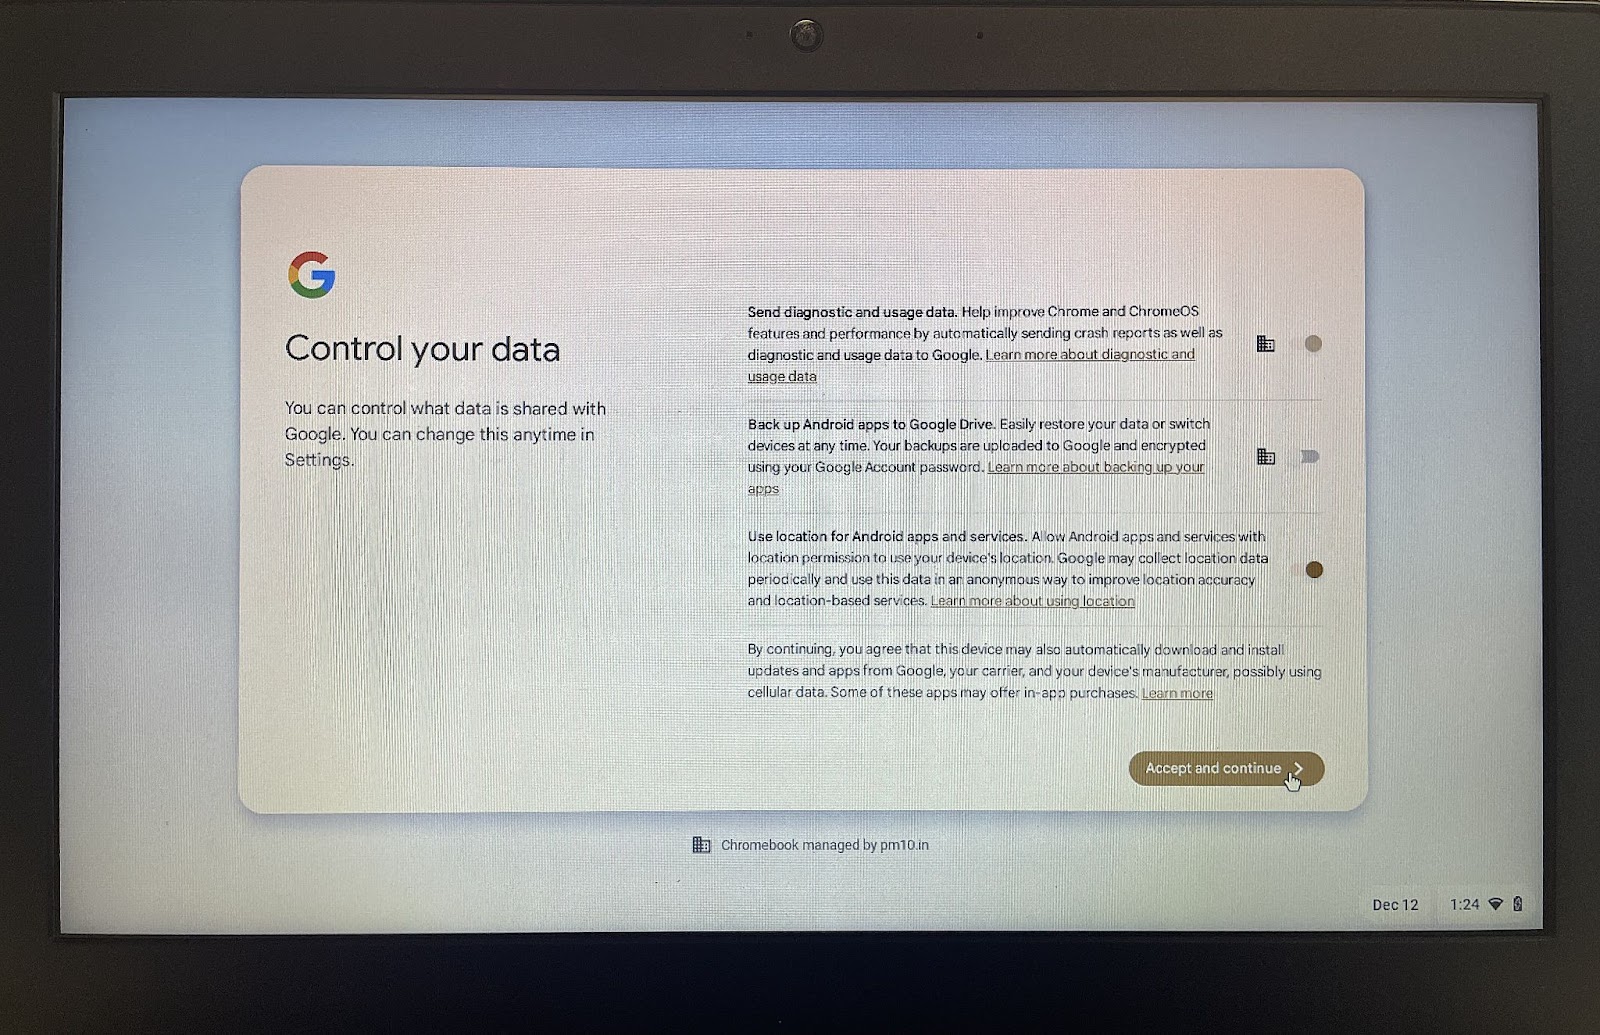
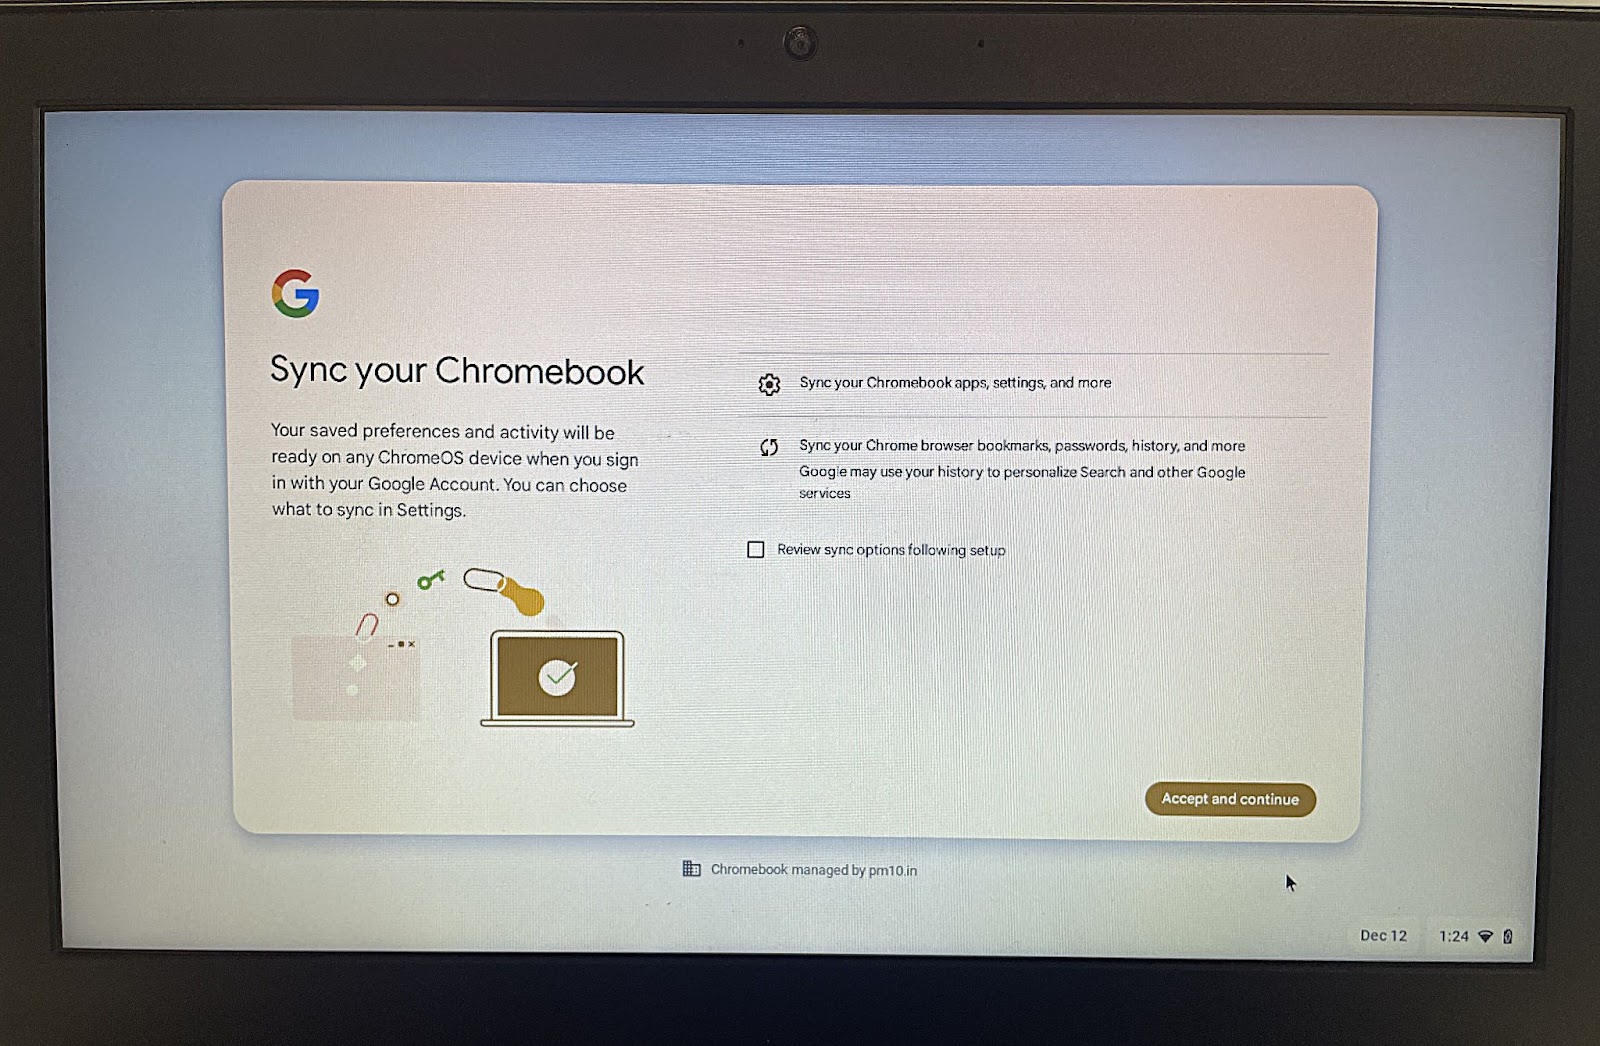
Step – 8 Accept Terms & Conditions: Re-enter the Google Workspace email and password, review the Terms & Conditions, and click Accept and Continue.
The Chromebook is now fully enrolled and ready to configure policies and manage the device remotely through Scalefusion.
Common Issues During Chromebook Enrollment and How to Solve Them
Even with the best instructions, things can sometimes go sideways. Here’s how to troubleshoot common enrollment headaches:
Issue 1: Enrollment Screen Doesn’t Show Up
- Solution: Ensure the Chromebook is factory reset. If it’s been used before, perform a hard reset by pressing Esc + Refresh + Power to enter recovery mode, then reset the device.
Issue 2: Incorrect Admin Credentials
- Solution: Double-check the login details. If you’re still stuck, reset the password via your Google Workspace admin account.
Issue 3: Device Not Connecting to Wi-Fi
- Solution: Ensure the Wi-Fi network is stable and doesn’t require additional authentication. If needed, connect the Chromebook to a mobile hotspot temporarily.
Issue 4: Scalefusion Enrollment Fails
- Solution: Verify that the token generated in Scalefusion is still valid. If it’s expired, create a new one. Also, ensure the Chromebook is linked to the correct Google Admin Console.
Issue 5: Policies Not Syncing
- Solution: Reboot the Chromebook or manually trigger a sync from the Google Admin Console by clicking Force Device Sync.
Wrapping It Up
Scalefusion is here to make Chromebook as easy for you as possible by managing your ChromeOS devices. You can turn a simple setup process into a seamless experience. Just follow the steps, tick off the checklist, and troubleshoot like a pro if needed.
Ready to enroll your Chromebook? To know more, contact our experts and schedule a demo. Try your 14-day free trial today!
